Alot of critical business data is stored in C9. It is essential for your business that this information is securely backed up and duplicated so that in event of catastrophic failure: such as a hardware failure, or fire or theft that the data is still safe and secure.
Introduction to backups and backup technology
A backup can be performed from any terminal in your computer network. A backup can be created at any time. There is no need to stop using the system during creation of a backup. At the point of time the backup is started, all information that is in c9 is backed up as is. If you use c9 while a backup is running, then those recent changes will not be part of that backup, they will be part of the next backup. A backup is like a snapshot photograph. The snapshot is instantaneous, though the process of developing the photo still takes a little while.
An actual backup involves creating a single computer file that stores all of the information in the c9 application. This computer file is then copied onto a storage device, like a CD or a thumb drive and should be carried off premises.
Be careful with thumb drives! Thumb drives have a limited life and constant deleting and rewriting files on thumb drives will steadily degrade the integrity of these devices. Thumb drives are cheap, replace them often. Ideally use a thumb drive and only write files to it. Once it is full, buy a new drive.
Be careful with all media types! They have a limited shelf life. e.g. CD-R's typically have a 10 year shelf life; but it varies substantially on the quality of the device you are using.
Creating a backup
A backup can be performed from any terminal in your computer network.
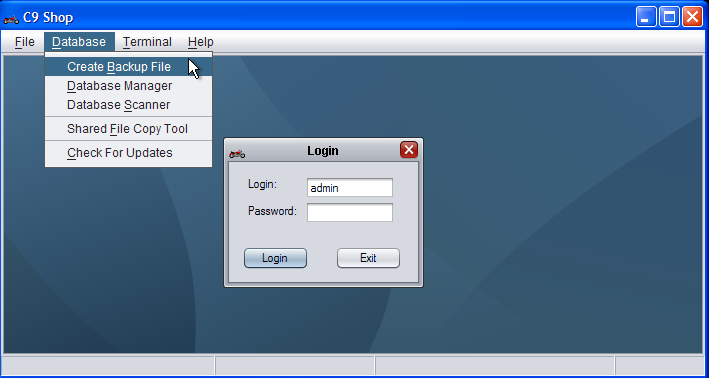
Step 1 From a terminal in C9, click on the 'database' option at the top of the screen; then click on backup.

Step 2 This will popup a save file screen where you can specify where the backup file is to be saved to.
For first time you do a backup from a terminal, this will default to a directory called \c9backup. If this directory does not exist it will be automatically created
For subsequent backups, this will default to the last directory you used for creating backups.
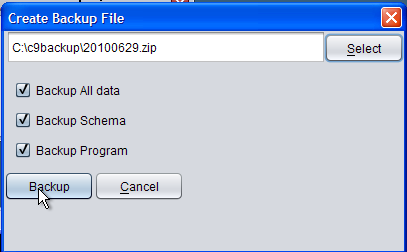
The file name will reflect the current day. For example, June 29th 2010 creates a file called 20100629.zip. If the file name already exists then the file name will have additional numbers added to it to make sure it is a unique name.
If you plan to backup to CD then, recommendation is to save the file into c9backup then use your CD burner software to burn the file to a CD. See later steps.
If you plan to backup to a flash drive then suggest simply save the file to the flash drive directly. Plug in the flash drive then click on 'Look In' drop down list and then select the flash drive from this list.
Step 3 - After clicking save. You will then be shown the following screen. Simply click 'Backup' to continue. Do not change default settings as they appear.
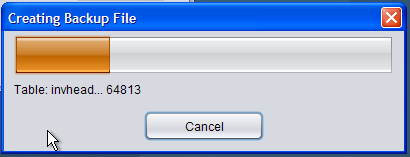
Step 4 - After clicking backup. The backup will begin automatically
Step 5 - On success you will see the following message. If you see any message other than this, a message that indicates a problem. It is critical that you contact c9 support immediately. Your backup may not of succeeded.
Step 6 - finally. If you intend to backup onto a CD. Insert a blank CD and when windows detects a CD click on burn new CD. From this screen select the newly created backup file to backup and then click burn CD. If you are unsure about this step then please contact C9 support to assist. Unfortunently this step can vary significantly depending on how your computer is setup; so it is not possible to provide generic instructions. Again if you are unsure please contact C9 support.


