Restoring prior data requires that you have a prior backup file from which to restore from. See How to create a backup For information on how to backup first.
WARNING! : Restoring data is a dangerous process. Errors could result in total data loss. Errors could result in subtle problems that you may not detect immediately yet result in difficult to resolve problems weeks later. This section is targeted at experienced computer users and written for such an audience. If you do not fully understand the presented instructions, contact C9 support or your local IT support.
Step 1 - Install C9 Database
C9 Database is a separate program that needs to run on a single computer in the computer network; ideally the fastest, most modern computer with the most RAM and fastest hard disks. Minimum specifications are entry level computer, yet the more RAM and faster hard disks the computer has the faster C9 across the entire network will perform. The Database C9 uses is actually a PostgreSQL database. C9 provides a custom installer, which simplifies the process of installing PostgreSQL.
If you plan to restore a database to a computer that already has PostgreSQL installed, i.e. you want to overwrite the information that the server has already installed then you can skip this step.
If you are installing PostgreSQL onto a second computer, you need to be especially careful at the end of the restore process to uninstall PostgreSQL from the original computer. The reason is that you do not want to create a situation where some terminals accidentally connect to the old database. It will mean that the c9 system in the shop will be inconsistent since different terminals are looking at different data. Such situations are nearly impossible to resolve.
To install PostgreSQL simply goto Downloads and download and run the "C9 Database Installer" download; and click through the installer.
Step 2 - Start a terminal to begin restore process
Restore can be performed from any terminal in the network.
If the terminal doesn't have c9 already installed, you need to download and install the terminal program from Downloads and download and run the "C9 Terminal/Client Installer". This installer asks only one key question: is the system a primary or secondary terminal. A primary terminal is a terminal where a program called messenger is also installed (which is typically the most frequently used terminal). If you are decommissioning the existing primary terminal then you will want to make the new computer the new primary terminal. Otherwise make it a secondary terminal.
If the terminal already has C9 already installed. You need to manually delete a file on the computer that makes the terminal 'forget' where the database server is located.
- Start c9 program
- Goto File : Exit and restart java. To make sure c9 is no longer running on the computer
- Use task manager (Control+Alt+Delete) and goto process table. Kill any stray javaw.exe processes
- C9 is typically installed in c:\c9. In this directory is a file called db.properties. Delete this file.
Step 3 - (Re)locate Data Server
Start c9 program on the terminal computer you plan to use to restore from.
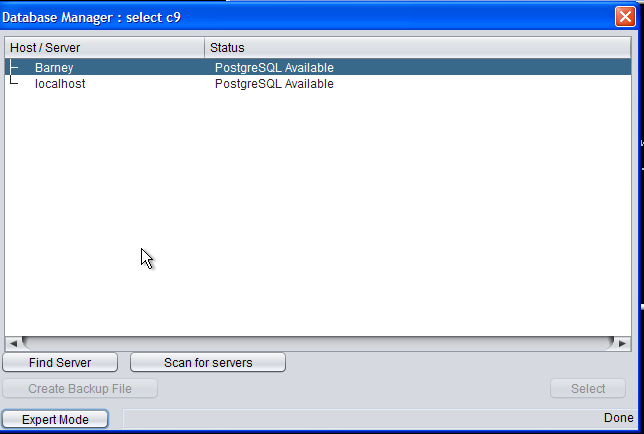
This will popup a window labelled 'Database Manager'. In this window you can search, create,select and restore databases.
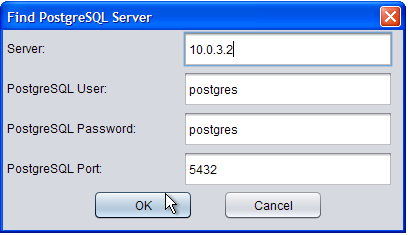
This program will automatically scan the network for data servers. Under some circumstances the scan will fail to detect other servers. In this case you need to click on find server and in the field for 'Host' you need to manually type in the IP address or host name of the computer the server is installed on.
To restore a database you need to enter expert mode. Click on the expert button on bottom left of the window.
Step 4 - Create new empty database
If you are restoring to a brand new installation of Postgres. You need to create a new empty database. If you are restoring over the top of an existing database, you can skip this step.
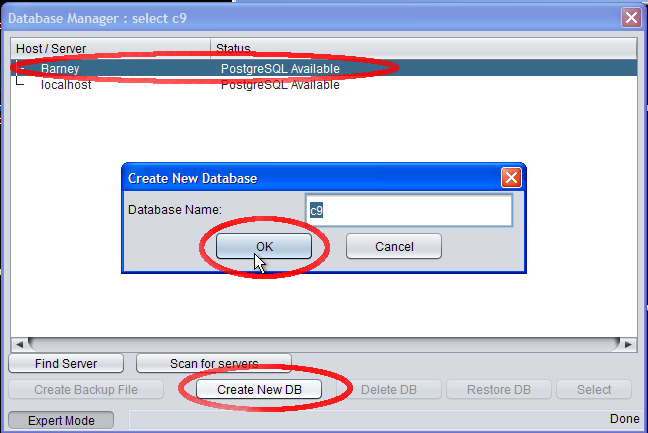
Firstly select the Postgres instance you want to create a database for. Make sure you select the correct one. Once highlighted click on t he "create new database" button. Then click ok to create a new database. Leave the name as it is. i.e. "c9"
Step 5 - Restore data to database
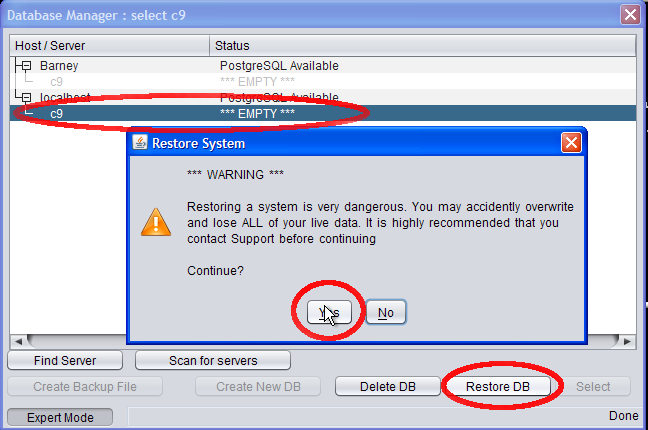
Select the database you wish to restore to. Make your selection carefully! Restore is an irreversible process.
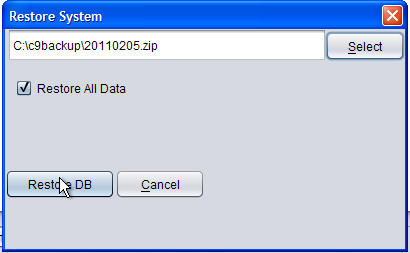
After selected you will need to select the restore file to restore from. Again choose carefully! Once done click on "Restore DB".
Note that restoring to a new database is substantially quicker than overwriting data in an existing database. You could select 'Delete DB' first and then create a new database to speed up process, but this option is not recommended because the delete is permanent and if restore file has problems with it, then the data is permanently lost.
Step 6 - Post Restore. Run First terminal
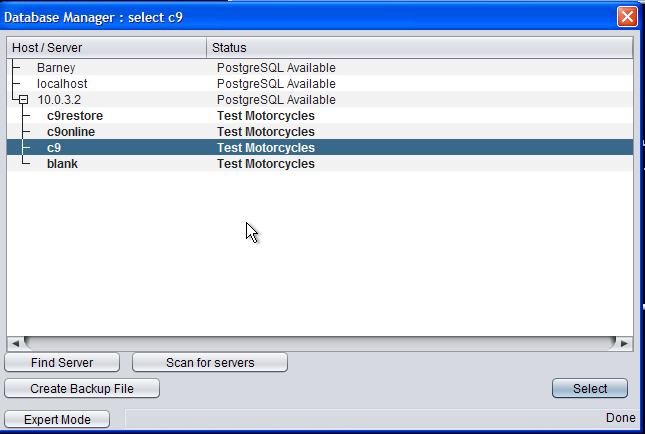
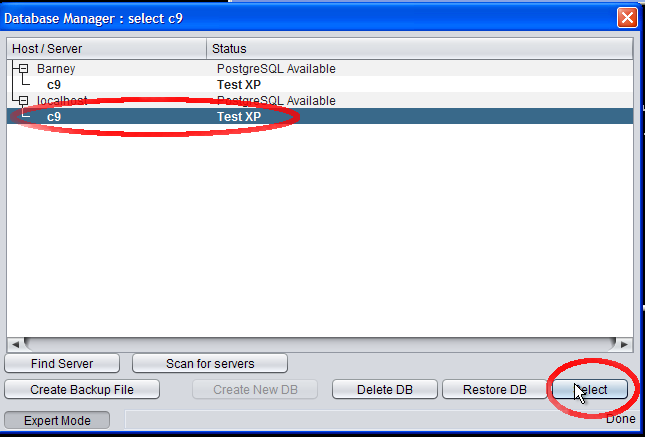
After install is completed, highlight the newly restored database and click Select. This will initialise the terminal on this computer.
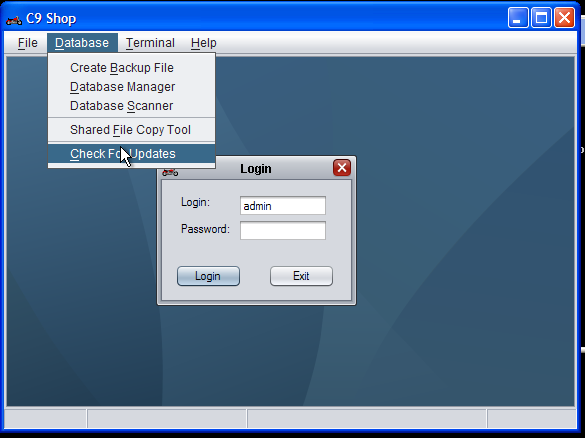
After terminal starts it is recommended that you select 'Database', 'Check for updates'. Check for updates only needs to be done once. The update is saved in the database itself. Other terminals will automatically update from this. The only thing that restore does not restore is 'check for updates' information.
Step 7 - Post install. Other terminals
If you have restored over the existing production database then there is no need to do anything on other terminals.
If this is not the case then you need to perform steps similar to step 1 described above to make the terminal 'forget' its database settings
- Start terminal
- Select File -> Exit and restart java
- Delete the \c9\db.properties file
- Restart terminal
On restart, select the correct c9 database. (Make sure you are pointing to the correct postgreSQL server!). And click 'select'
Step 8 - Delete old database Server
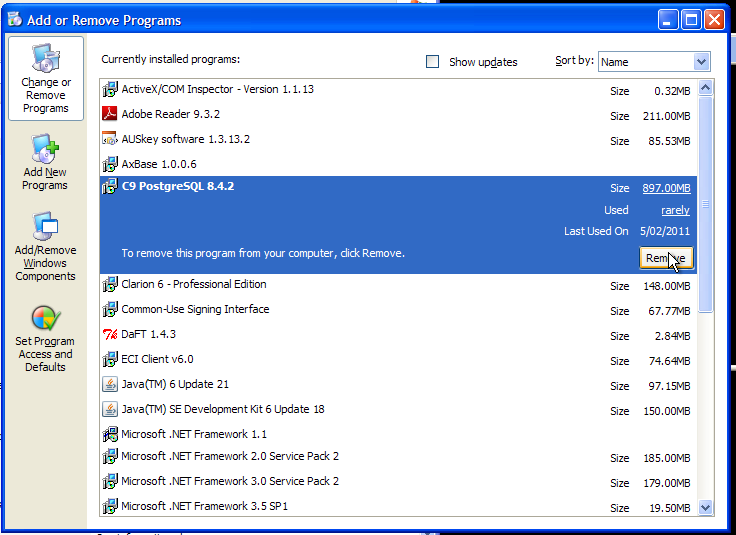
If you have installed postgres on a new server. It is recommended that you uninstall postgres on the old server to remove risk of wrong database being accessed. To do this goto Add/Remove programs on the old computer and uninstall. Note that this does not actually physically delete the data; it merely disables postgres. So running install later will see that the original data is still intact.


